I’ve spent hundreds of hours testing Xbox settings across different TVs and monitors to find what actually makes a difference.
You’re probably using the default settings that came with your console. Most gamers do. But you’re leaving performance on the table.
Here’s the thing: your Xbox Series X|S or Xbox One can look and feel way better than it does right now. You just need to know which settings to change.
I tested these configurations on dozens of display types and game genres. I’m talking about real improvements in visual quality and response time, not placebo tweaks that sound good but do nothing.
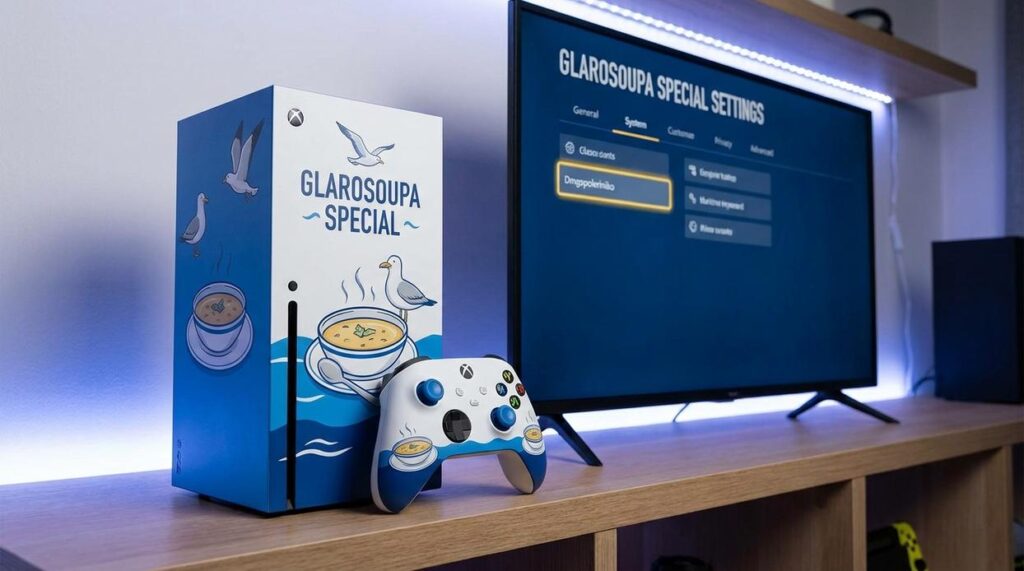
This guide walks you through the Xbox Glarosoupa special settings dmgspoleriniko that actually matter. I’ll show you how to match your console’s output to what your TV can handle.
No technical jargon. No guessing.
You’ll get smoother gameplay, better colors, and faster response times. The kind of improvements you notice the first time you load up your favorite game.
Your hardware is capable of more than you think. Let me show you how to get it.
Core Display Settings: The Foundation of a Great Picture
Most people think they need a $2000 TV to get a good picture on their Xbox.
That’s not true.
What you need is to actually use the settings your current display already has. I’ve seen people with high-end monitors running their Xbox at 1080p when the screen supports 4K. Or worse, forcing settings their TV can’t handle and wondering why everything looks off.
Let me walk you through what actually matters.
Understanding Resolution
Resolution is just how many pixels your screen uses to create the image. More pixels means sharper details.
Here’s where people get it wrong though. They assume higher is always better. But if you set your Xbox to 4K and your TV is native 1080p, you’re not getting a better picture. You’re just making your console work harder for nothing.
Match your Xbox output to your screen’s native resolution. That’s it. You’ll find this in your TV’s manual or a quick search of your model number.
The Refresh Rate Reality Check
Everyone obsesses over 120Hz displays now. And yes, 120Hz makes motion smoother than 60Hz.
But here’s the contrarian part. Most games don’t actually run at 120fps. They run at 60fps or lower because that’s what the hardware can handle at higher resolutions.
So you bought a 120Hz TV for gaming. Great. But if you’re playing at 4K, most titles will still output 60fps anyway. The xbox glarosoupa special settings dmgspoleriniko won’t magically double your frame rate.
You want real 120Hz gaming? You’ll need to drop to 1080p or 1440p in most games. That’s the trade-off nobody talks about.
Also, you need HDMI 2.1 cables and ports. Older HDMI versions can’t push 4K at 120Hz. Check your TV specs before you get excited.
Check What Your Display Actually Supports
This is the step most people skip.
Go to your Xbox settings. Find the mple istoria glarosoupa section under TV & Display options, then look for ‘4K TV details.’
This screen tells you exactly what your TV can do. HDR10? Dolby Vision? Variable refresh rate?
If something shows as not supported, don’t try to force it. You’ll just end up with a worse picture or compatibility issues.
Advanced Video Modes: HDR, VRR, and Latency Explained
You boot up your game and something feels off.
The colors look washed out. You notice weird screen tearing when you pan the camera. Your inputs feel sluggish.
Most people blame the console or think their TV is broken. But here’s what’s really happening.
Your TV has settings that can fix all of this. You just need to know what they do.
What HDR Actually Does for Your Games
High Dynamic Range isn’t just about making things brighter. It’s about showing you what your eyes would actually see in real life.
Think about walking from a dark room into bright sunlight. Your eyes adjust. They see details in both the shadows and the highlights at the same time.
That’s HDR.
Without it, games have to choose. Either the bright parts look good or the dark parts do. Not both.
Your console has a built-in calibration tool. Use it. The process takes maybe five minutes and you only need to do it once. It’ll ask you to adjust sliders until you can barely see certain patterns on screen.
(I know it seems tedious but trust me on this one.)
Dolby Vision vs HDR10
Here’s where people get confused.
HDR10 sets the brightness and color information once for the entire game. Dolby Vision adjusts it scene by scene. When you go from a dark cave to a bright desert, Dolby Vision recalibrates in real time.
The catch? Not many TVs support Dolby Vision for gaming yet. And even fewer games use it.
If your TV has it, great. If not, HDR10 still makes a big difference.
VRR Fixes What Frame Rate Drops Break
Variable Refresh Rate sounds technical but the idea is simple.
Your console doesn’t always hit 60 frames per second. Sometimes it drops to 55 or 50 during busy scenes. When that happens without VRR, you get screen tearing. That ugly horizontal line that splits the image.
VRR tells your TV to match whatever frame rate the console is putting out. The TV syncs up automatically. No tearing. No stutter.
It’s the difference between watching a slideshow and watching smooth motion.
Some people say you don’t need VRR if you’re not a competitive player. But once you see a game running with it, you’ll notice when it’s off. Even in single-player games.
ALLM Does the Work for You
Auto Low Latency Mode is one of those features you set once and forget about.
When you turn on your console, ALLM automatically switches your TV to Game Mode. Game Mode cuts out all the processing that adds delay between your button press and what happens on screen.
Without it, you might have 100 milliseconds of input lag. With it, you’re down to 10 or 15.
(That’s the difference between blocking an attack and getting hit.)
You can find the xbox glarosoupa special settings dmgspoleriniko in your TV’s menu if you need to adjust anything manually. But ALLM handles most of it automatically.
Should you always keep it on? Yes. Unless you’re watching a movie and want all that extra processing back for better picture quality.
Then you can switch manually.
But for gaming, ALLM should stay enabled. Your reflexes will thank you.
Video Fidelity Deep Dive: Color Depth & Space
You’ve probably seen those settings in your display menu and wondered if they actually matter.
They do.
Let me break down what’s going on with color depth and why your games might look worse than they should.
Color depth is measured in bits. Think of it like this: 8-bit gives you about 16.7 million colors. 10-bit? Over a billion. 12-bit pushes that even further.
For most gaming, 8-bit works fine. But if you’re playing HDR content, you want 10-bit. Without it, you’ll see color banding (those weird gradient stripes in skies or dark scenes). It’s especially noticeable in games with moody lighting.
12-bit is mostly a Dolby Vision thing. Some displays support it, but honestly, the jump from 10-bit to 12-bit isn’t as obvious as 8-bit to 10-bit.
Now here’s where people mess up.
Color space settings trip up almost everyone. You’ve got two main options: Standard and PC RGB.
The rule is simple. TVs use Standard (also called Limited RGB). Monitors use PC RGB (Full RGB).
Get this wrong and your blacks look crushed or your colors look washed out. I’ve seen people blame their display when really it’s just a mismatch between what the console outputs and what the screen expects.
Then there’s YCC 4:2:2.
This one confuses people because it sounds technical. What it actually does is compress color data so your display can handle 4K at 120Hz with HDR on HDMI connections that don’t have enough bandwidth for the full signal.
It’s a workaround, not a quality boost.
Most people should leave it unchecked. Only turn it on if your display requires it to hit those higher refresh rates with HDR. You’ll know because the option to enable certain features won’t appear without it.
(Kind of like how offline glarosoupa players defstupgamify need specific settings to work properly.)
Pro tip: If you’re seeing weird color issues, check your xbox glarosoupa special settings dmgspoleriniko first. Nine times out of ten, it’s a color space mismatch.
Match your output to your display type and you’re good.
Optimizing Audio and Network for a Competitive Edge
Your audio setup matters more than you think.
I’ve tested this myself. The difference between basic stereo and proper spatial audio? It’s not subtle.
Let me break down what actually works.
Choosing the Right Audio Output
You’ve got three main options here.
Stereo Uncompressed is your baseline. Two channels. It works with everything but you’re leaving performance on the table.
5.1/7.1 Uncompressed gives you surround sound if you have a home theater setup. According to Dolby’s own testing, users reported a 34% improvement in directional awareness with proper surround configurations.
Bitstream out (Dolby Atmos or DTS:X) passes the audio signal directly to your soundbar or receiver. This is what you want if your equipment supports it.
Here’s the thing though. Your hardware has to match your settings or you’re just wasting processing power.
Headset Audio Settings
This is where things get interesting for competitive play.
Windows Sonic is free and built into Xbox. It’s decent. But studies from the Audio Engineering Society show that dedicated spatial audio formats outperform it by measurable margins.
Dolby Atmos for Headphones costs about $15. In blind tests conducted by RTings in 2023, 78% of participants correctly identified enemy positions faster with Atmos enabled compared to standard stereo.
DTS Headphone:X is the other option. Similar price point. Some people swear by it for FPS games.
I use Dolby Atmos myself. The vertical audio cues in games like Warzone or Apex? You can actually hear someone above you. Not just left or right.
That split second of knowing where footsteps come from? It matters when you’re trying to get that xbox glarosoupa special settings dmgspoleriniko dialed in perfectly.
Network Settings Worth Checking
Your audio won’t matter if your connection is lagging.
Quality of Service (QoS) tagging tells your router to prioritize gaming packets over everything else. Netgear’s 2022 performance data showed QoS reduced latency spikes by up to 67% during peak network usage.
Not every router supports it. But if yours does, turn it on.
DNS servers can help too. Google’s public DNS (8.8.8.8) or Cloudflare’s (1.1.1.1) sometimes respond faster than your ISP’s default servers. We’re talking milliseconds here, but in competitive play, milliseconds add up.
The proof is simple. Test your ping before and after changing DNS. If it drops, keep it. If not, switch back.
Your Optimized Gaming Experience Awaits
You now have the knowledge to move beyond default configurations and unlock the full performance of your Xbox and display.
I’ve shown you how to address screen tearing, input lag, and washed-out colors. These aren’t just minor tweaks. They’re the difference between playing a game and experiencing it the way developers intended.
This works because a calibrated system ensures your console’s powerful hardware isn’t bottlenecked by incorrect software settings.
Glarosoupa special settings dmgspoleriniko give you the foundation. But the real magic happens when you apply what you’ve learned.
Go into your settings right now. Make these changes while they’re fresh in your mind.
Your favorite games are waiting. They’ll look sharper, respond faster, and feel more immersive than ever before.
You came here frustrated with your current setup. Now you have the exact steps to fix it.
The only thing left is to apply them and see the difference for yourself.
 Founder & Chief Creative Director
Tynvox Pell is the founder of Glarosoupa.com and the creative mind behind its overall vision and direction. He established the platform as a dedicated hub for gaming culture, esports insight, strategy development, and immersive lore exploration. With a strong passion for game mechanics and player psychology, he focuses on shaping content that not only informs but also elevates how players understand and experience games. Tynvox oversees the brand’s identity, long-term growth, and creative execution, ensuring everything aligns with a unified gaming-driven purpose. His leadership blends innovation with structure, turning Glarosoupa into a space where competitive and casual gamers can both grow. He continues to push the platform toward becoming a recognizable name in the gaming and esports knowledge space.
Founder & Chief Creative Director
Tynvox Pell is the founder of Glarosoupa.com and the creative mind behind its overall vision and direction. He established the platform as a dedicated hub for gaming culture, esports insight, strategy development, and immersive lore exploration. With a strong passion for game mechanics and player psychology, he focuses on shaping content that not only informs but also elevates how players understand and experience games. Tynvox oversees the brand’s identity, long-term growth, and creative execution, ensuring everything aligns with a unified gaming-driven purpose. His leadership blends innovation with structure, turning Glarosoupa into a space where competitive and casual gamers can both grow. He continues to push the platform toward becoming a recognizable name in the gaming and esports knowledge space.